Of all the conic section construction techniques, my favorite is undoubtedly the approach that requires nothing more than a paper circle.
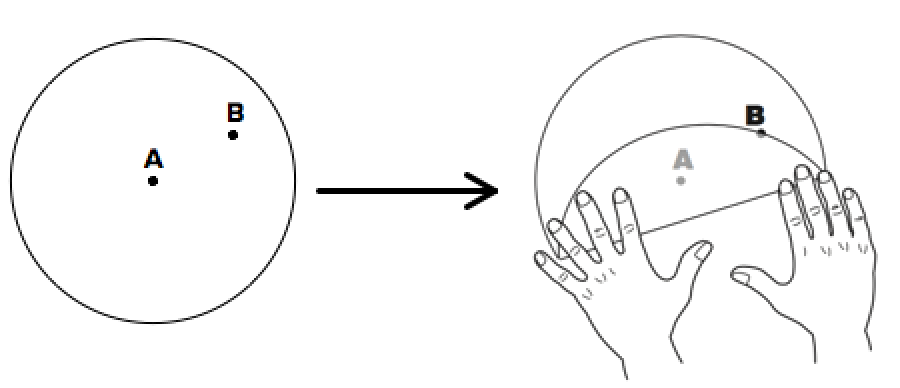
Here’s what to do: Draw or print a circle and its center, point A, on a sheet of paper. Cut out the circle. Mark a random point B anywhere on the circle. Then, fold the circle so that a point on its circumference lands directly onto point B. Make a sharp crease to keep a record of this fold. Unfold the circle. Now fold the circle along a new crease so that a different point on the circumference falls on point B. Unfold the circle and keep repeating the process.
 After you’ve folded a half dozen creases or so, pause and predict what you’ll see if you continue to make creases. Will the entire circle be filled with a hodgepodge of folds? Will there be a discernible pattern to the creases? Resume folding—make at least 20 or more creases—and prepare to be amazed!
If you have the patience, start with a new circle and pick a different location for point B, either closer to the edge of the circle or nearer to the center, and fold again. How does the location of point B affect the result?
Wouldn’t it be great if you could try different locations for point B without spending lots of time creating the new creases? Building a dynamic geometry model of the folded circle construction with Web Sketchpad makes that possible. Using the model below (and here), you can pick a location for point B, quickly generate a large set of creases, drag point B to a new location, and then recreate the creases in a snap. The video below demonstrates the construction, gives tips for proving what you discover, and describes a follow-up investigation that involves folding a paper rectangle.
You’ll find a treasure trove of conic section construction techniques in my book, Exploring Conic Sections with The Geometer’s Sketchpad.
Fascinating. Thanks for posting this, Daniel.