What’s New with Web Sketchpad in 2019
For the past five years, Scott and I have featured interactive Web Sketchpad models in nearly all our Sine of the Times blog posts. As much fun as it’s been to build “websketches” to share with you, we’ve really wanted to put the creative power of Web Sketchpad into your hands.
And now, finally, that’s possible. Today we’re announcing two Web Sketchpad beta-test webpages, the Tool Library and the Viewer, that allow you and your students to create and share websketches with each other. The best way to learn about these pages is to watch our three introductory videos. But here, I’ll provide an overview to whet your appetite.
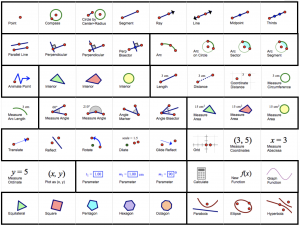
The Tool Library comes with over 50 tools (shown below). They range from basic geometry tools (point, compass, and straightedge) to more wide-ranging tools (calculator, function grapher, conic sections). Clicking any of the tool icons adds that tool to your websketch. You can tailor the tools you provide to students on an activity-by-activity basis, and even specify the order in which the tools appear in the toolbox that accompanies your websketch.
With your tools in place, you can add content to your websketch. If, for example, you would like students to construct squares on the sides of a right triangle, you can construct the triangle so that it comes prebuilt for them.
A download feature allows you to save your prepared websketch to your computer. You can then share it with students using, perhaps, Google Drive or email. To open and interact with the websketch, students use the WebSketch Viewer page. When they are finished with their work, they download their completed websketches and share them with you.
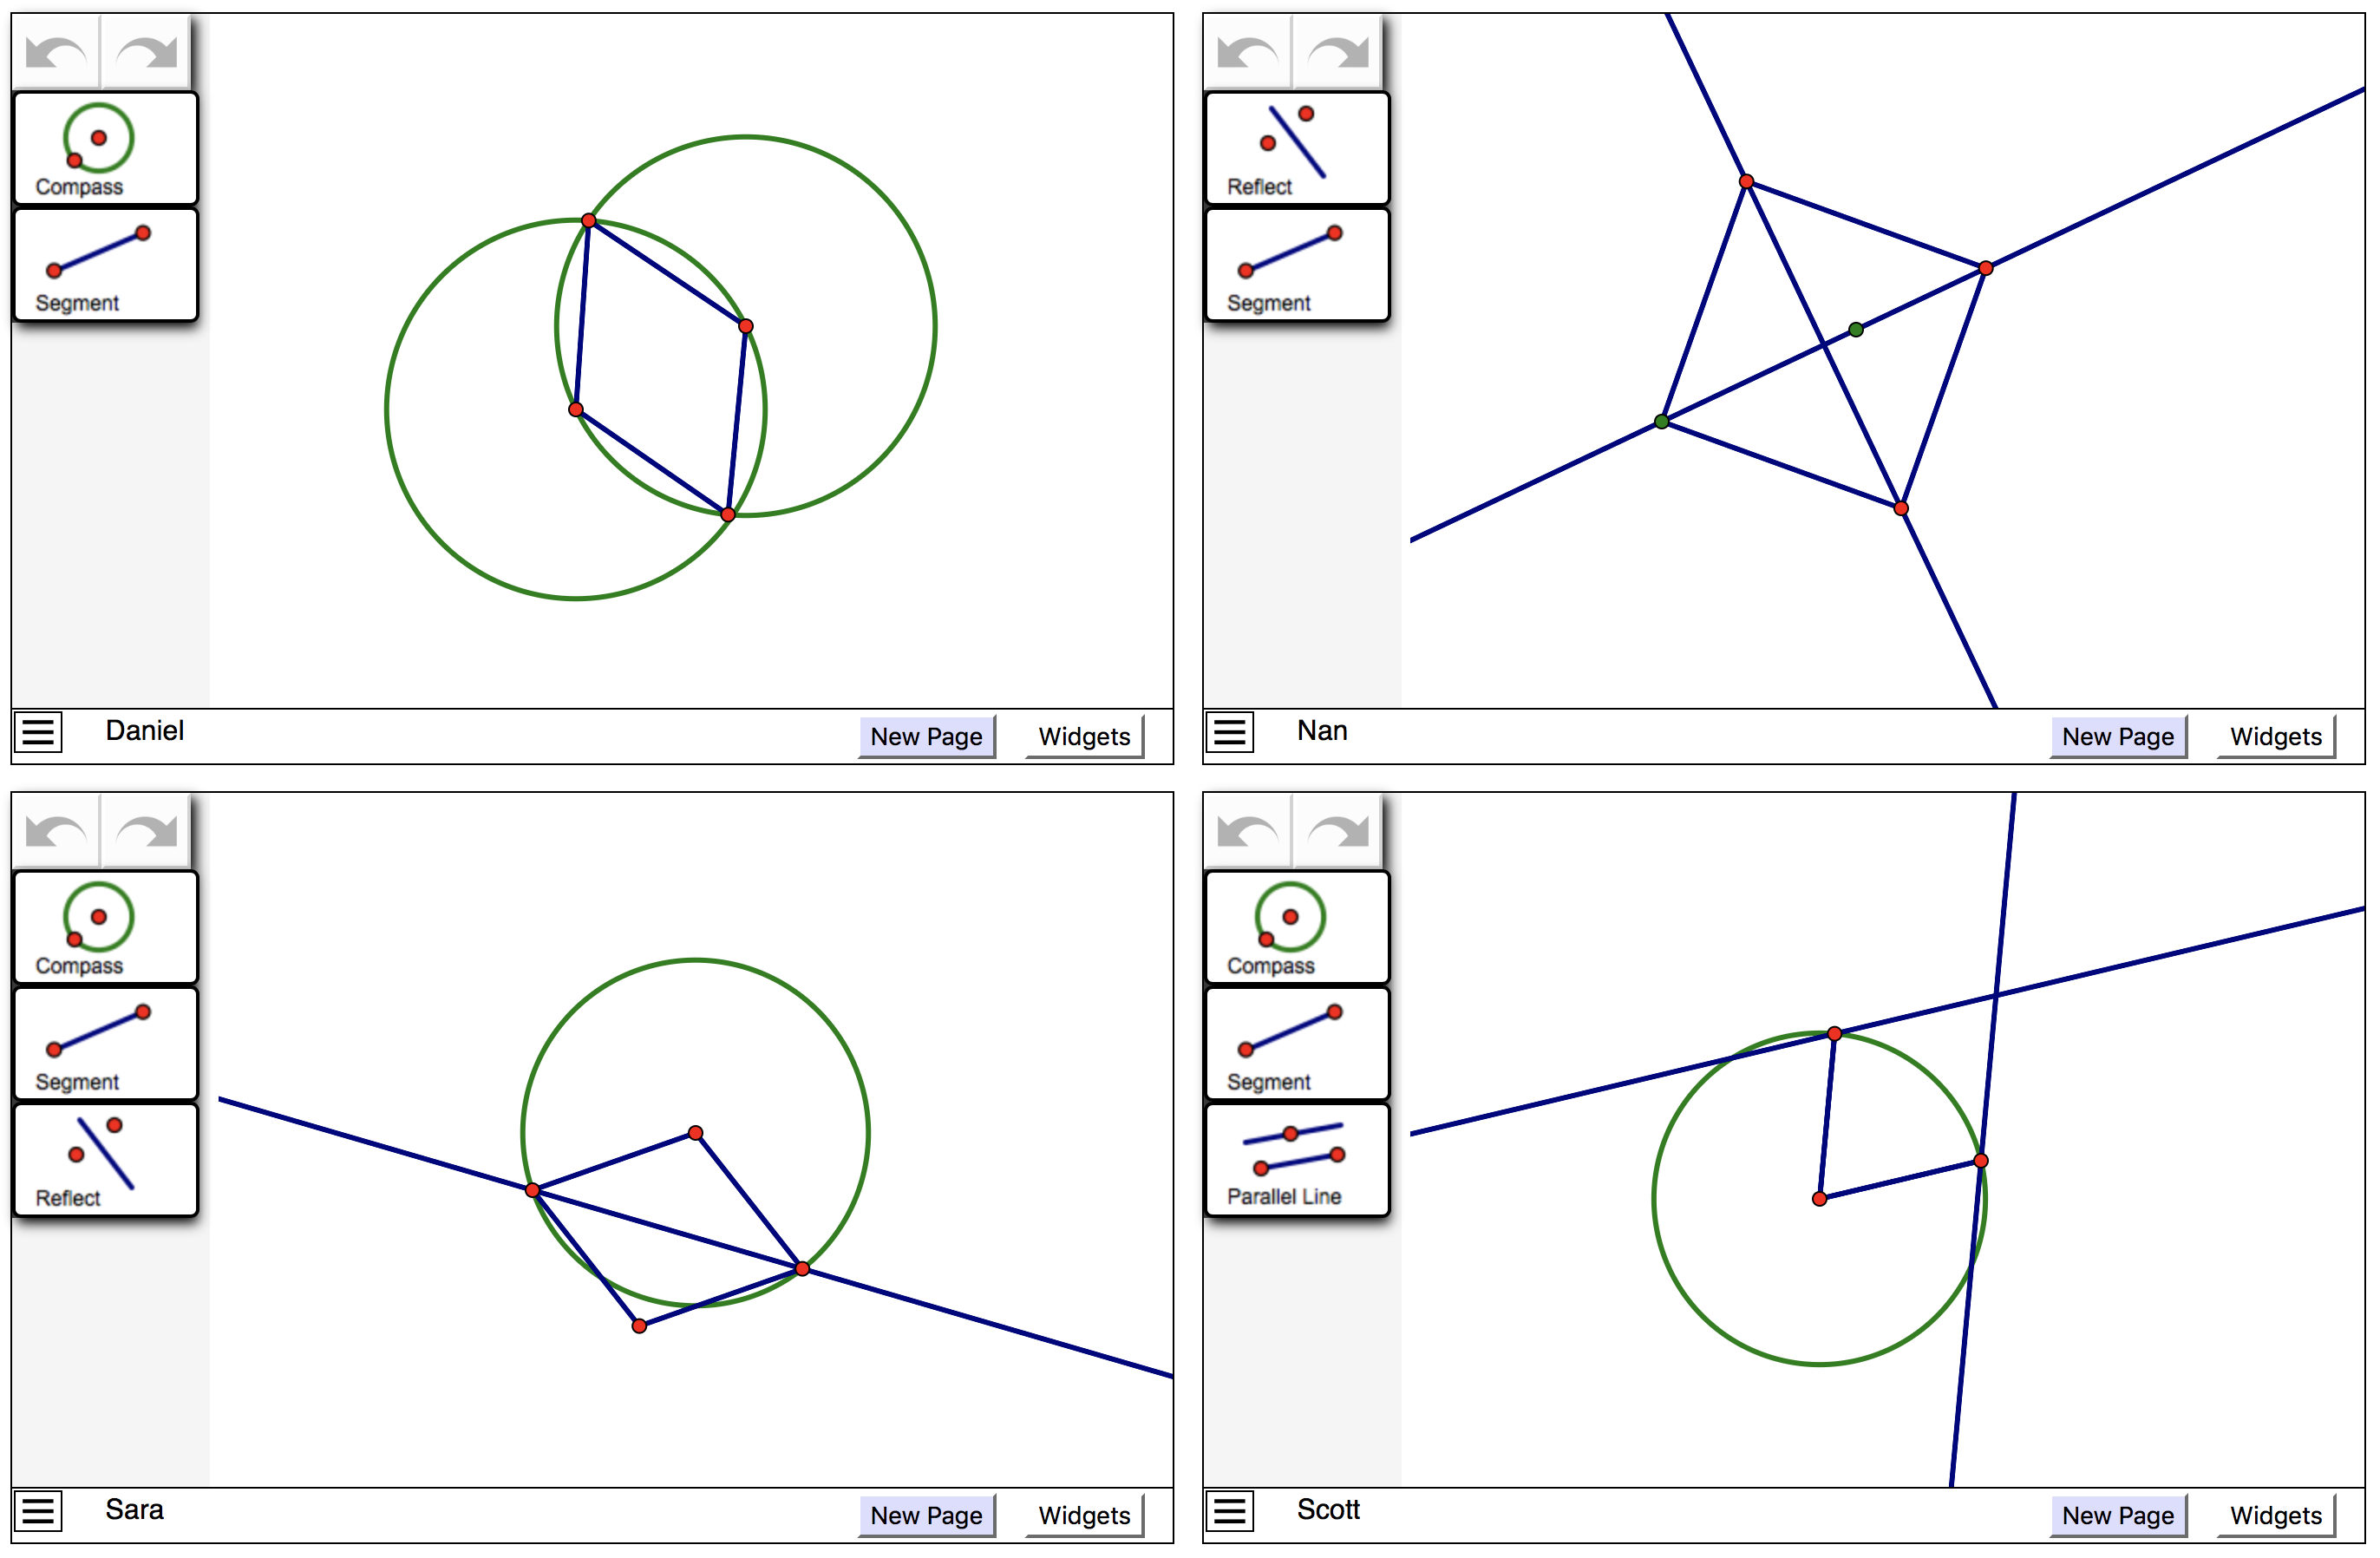
With desktop Sketchpad, the only way to view students’ completed constructions was to open them one by one. Web Sketchpad improves this process enormously, allowing you to select multiple files and open them simultaneously on the WebSketch Viewer page. Below, for example, is a picture of four rhombus constructions submitted by Scott, Nan, Daniel, and Sara, all on the same webpage.
These websketches are fully interactive—you can test the students’ rhombi by dragging their vertices. You can swap the order of the websketches and use the tools in any four of the toolboxes to add new construction elements to the students’ work. And while the WebSketch Viewer is perfect for reviewing students’ work, we think it’s even better when used to sequence websketches for student presentations.
That’s the basic information; you’ll learn more in our three videos. So go ahead, give Web Sketchpad a try in your classroom. You’re free to use the Tool Library and the WebSketch Viewer for non-commercial purposes. We’d love to hear your feedback as we continue in 2019 to refine Web Sketchpad’s features.